Iowa DOT Section 2602 confirms the stakes: failure to initiate required stabilization measures on permitted sites can result in a $750 daily deduct on Iowa DOT projects.
This guide walks through the complete ECB installation process — from site preparation and product selection through slope and channel installation, post-installation checks, and fixes for common failure modes. Whether you're a field crew on a highway embankment or a contractor stabilizing a drainage channel, the sequence is the same.
Key Takeaways
- Seed before you install — placing a blanket over unseeded soil traps the problem, not the seed
- Dig 6" × 6" anchor trenches at the top and bottom of every installation area, slope or channel
- Staple density is slope- and product-specific; verified values range from 0.6 to 3.8 staples/yd²
- Overlaps must run shingle-style (uphill blanket over downhill) with a minimum 4–6 inch overlap secured with staples
- Inspect within 24 hours of any qualifying storm event until vegetation is fully established
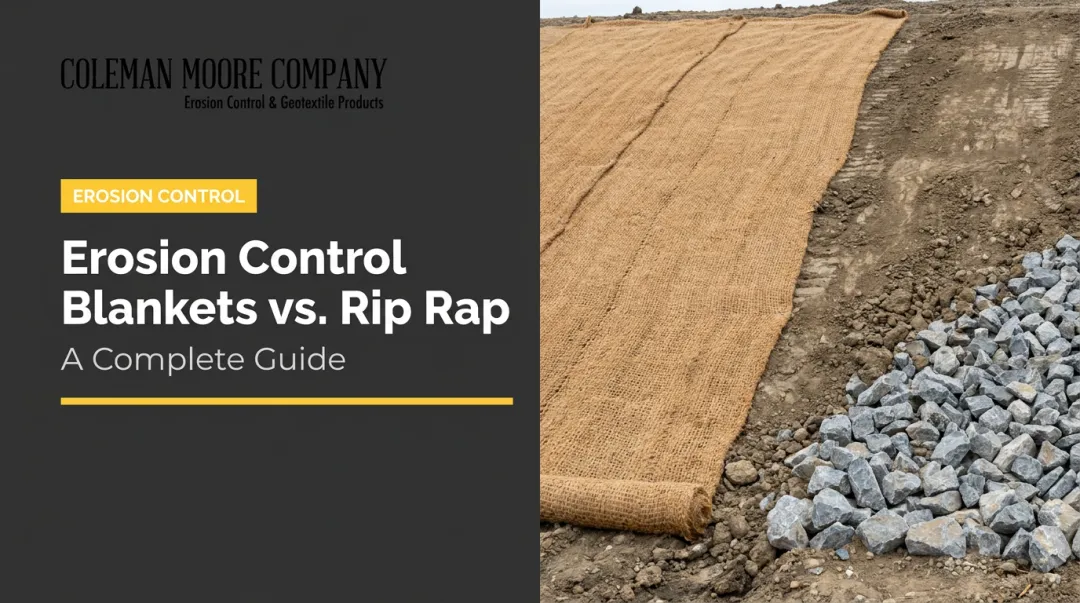
Installation Guide for Erosion Control Blankets
ECB installation has four phases: site preparation (clearing, grading, seeding), anchoring, rolling and overlapping, and post-installation validation. This sequence applies to both slope and channel applications — differences show up in orientation, stake density, and where check slots are placed.
Scale varies considerably. A small residential slope can be handled by one or two people with hand tools in a few hours. A highway embankment or long channel run typically requires a crew, mechanized unrollers, and an ATV or tractor. Depending on site complexity, expect a full day or more.
Prerequisites and Site Preparation
Before any blanket is unrolled, the site must meet specific readiness conditions:
- Clear all debris — remove rocks, roots, clay clods, and trash from the surface
- Grade to a smooth, uniform profile so the blanket maintains full contact with topsoil; ridges and voids create bridging
- Compact disturbed soil to give staples adequate holding strength — loose or recently graded surfaces won't anchor well
Seed first. Always. As Geosynthetics Magazine confirms, ECBs should always be seeded before installation. Lime, fertilize, seed, and compact the seedbed — then install the blanket over the prepared surface. Installing the blanket before seeding makes it extremely difficult to get seed into contact with soil.
Do not install on:
- Frozen or saturated ground (staples won't hold; blanket can't conform)
- Slopes steeper than the product's rated maximum gradient
- Surfaces with soil clods or debris that prevent full blanket-to-soil contact
Product Selection
Choosing the wrong blanket for the application is one of the more expensive mistakes on a site. Key selection factors:
| Factor | What It Determines |
|---|---|
| Slope steepness and length | Single net (up to 3:1) vs. double net (up to 1:1) |
| Expected runoff velocity | Biodegradable ECB vs. turf reinforcement mat (TRM) |
| Required establishment timeframe | Short-term straw (3 months) vs. excelsior/coir (12–24 months) vs. permanent TRM |
| Channel vs. slope application | Double-net wood excelsior or coir for channels; single net for milder slopes |

Coleman Moore Company carries the Curlex® line from American Excelsior Company, including single- and double-netted straw, wood excelsior, and coconut fiber blankets for short-term slope protection through channel and ditch lining. For high-velocity channels or permanent applications, Coleman Moore also stocks TRM products from Propex (LandLok® and Pyramat®) and American Excelsior (Recyclex®).
For Iowa DOT projects, confirm the selected product meets the applicable specification class under Iowa DOT Section 9040 before installation begins.
Tools and Materials Required
Required for all installations:
- ECB rolls (appropriate type and width for the application)
- Wire U-shaped staples or pins (gauge and length matched to soil conditions)
- Shovel or trenching spade
- Rubber mallet or staple driver
- Utility knife for trimming
Larger or mechanized installations require additional equipment:
- ATV or compact utility vehicle
- Twin unroller units and tow lines
A few additions can also improve efficiency and site compliance:
- Staple applicator tools (speed up large installations significantly)
- Temporary sandbags for high-flow channel reinforcement until vegetation establishes
- Biodegradable wooden stakes where DOT specifications or environmental sensitivity requires them
How to Install an Erosion Control Blanket (Step-by-Step)
Erosion control blankets are installed differently depending on whether you're working a slope or a channel. Both scenarios share the same core principles — full soil contact, properly anchored terminal ends, and staple density matched to site conditions — but the sequencing and orientation differ. Skipping steps like anchor trenches or reducing staple frequency on steeper grades creates vulnerabilities that often don't surface until the first significant rain event.
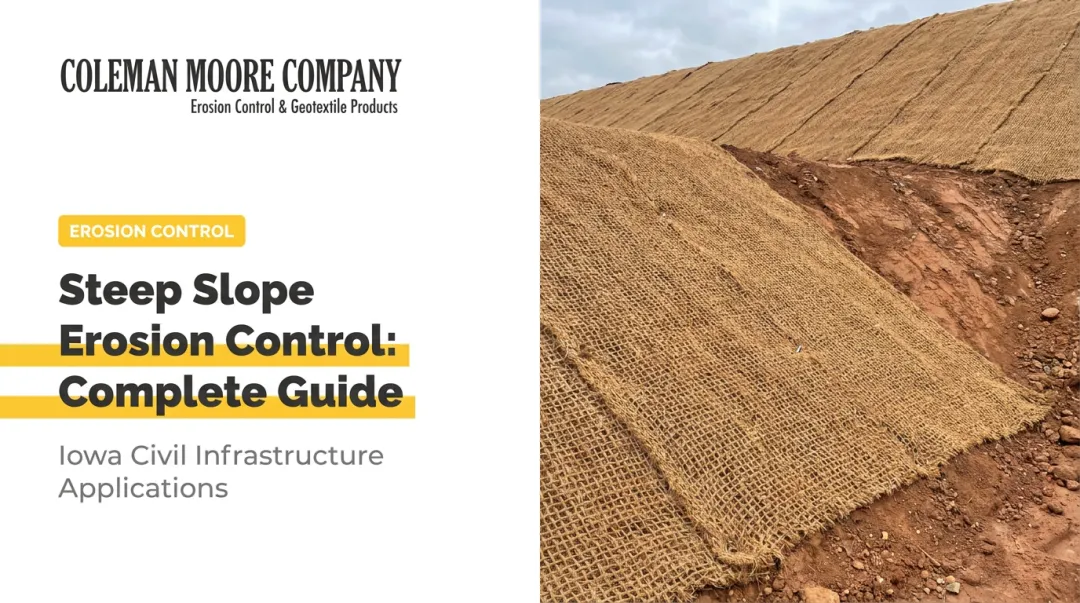
Slope Installation
Step 1 — Dig anchor trenches
Cut a 6" × 6" trench at the top (up-slope) and bottom (down-slope) of the application area. These trenches lock the blanket's terminal ends and prevent downhill migration under gravity or sheet flow. This dimension is confirmed by NAG/Western Green installation drawings and Iowa DOT Section 9040.
Step 2 — Position and anchor the top end
Place the leading edge of the blanket a minimum of 12 inches down-slope from the up-slope trench. Fold the excess back into the trench and secure with staples at 12-inch intervals. Backfill and compact.
Step 3 — Roll out downhill and stake
Unroll the blanket vertically down the slope. Keep it flat and in full contact with the soil — no air pockets, no bridging. Use staple density matched to your slope gradient and product:
| Slope Condition | Verified Density | Source |
|---|---|---|
| ≤ 4H:1V (Pattern A) | 0.6 staples/yd² | American Excelsior Curlex |
| ≤ 3H:1V (Pattern B) | 1.1 staples/yd² | American Excelsior Curlex |
| ≤ 0.5H:1V / steep (Pattern C) | 1.9 staples/yd² | American Excelsior Curlex |
| Iowa DOT minimum — slope | 1.3 anchors/yd² | Iowa DOT Section 9040 |
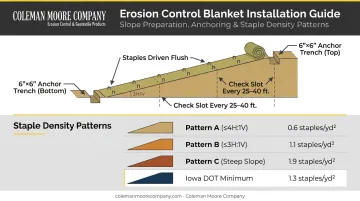
Drive staples flush with the soil surface.
Step 4 — Overlap parallel blankets
When multiple blankets run side-by-side, overlap parallel edges by a minimum of 4–6 inches and secure with staples approximately every 3 feet. Always orient shingle-style: uphill blanket over downhill blanket. Reversing this orientation funnels water under the seam.
Step 5 — Anchor the bottom end and add check slots
Secure the terminal end in the down-slope trench with staples at 12-inch intervals. Backfill and compact. On longer slopes, install a check slot — a double-staggered row of staples — every 25–40 feet across the blanket width to prevent mid-slope lift.
Channel Installation
Channel installation differs from slope work in two key ways: blankets run parallel to water flow rather than across it, and stake density is higher to resist hydraulic lift forces. Before starting, confirm that channel grade is uniform and both the bed and side slopes are smooth and free of debris.
Installation sequence:
- Begin at the upstream end of the channel
- Place the center blanket first, centered over the concentrated flow area — this avoids a seam at the deepest point of the channel
- Extend the leading edge at least 12 inches past the up-slope anchor trench; fold and staple at 12-inch intervals; backfill
- Roll downstream, parallel to flow direction, maintaining full soil contact
- Overlap channel side blankets by a minimum of 4 inches, with staples 5 inches apart at seams
- At the downstream terminal, secure in a 6" × 6" trench with staples on 12-inch centers; backfill and compact
- Fasten top-of-side-slope edges in a trench at 12-inch intervals with an additional row of staples 1 foot down-slope
Channel stake density:
| Channel Condition | Verified Density | Source |
|---|---|---|
| Higher-flow channel/shoreline | 3.8 staples/yd² | NAG/Western Green Pattern E |
| Iowa DOT minimum — channel | 1.7 anchors/yd² | Iowa DOT Section 9040 |
Insert check slots every 25–40 feet using a double-staggered row of staples 6 inches apart.

Post-Installation Checks and Validation
Once the blanket is in place, verification is what confirms the installation will hold. Inspect immediately after installation, then again within 24 hours of the first qualifying rain event.
What to verify during initial inspection:
- Full soil contact across the blanket surface — no bridging or air pockets
- All anchor trenches backfilled and compacted
- All overlaps oriented shingle-style and stapled
- No exposed soil gaps at edges, seams, or transitions
Reading the signs after rain:
| What You See | What It Means |
|---|---|
| Blanket lies flat, no edge lifting, trench fill intact | Correctly installed |
| Pulls or sags on steep sections | Insufficient staple density |
| Lifted edges or displaced trench fill | Anchor trench not compacted; staples not driven flush |
| Water channeling under the blanket | Poor soil contact; repair before next event |
Poor soil contact causes surface water to flow under rather than over the blanket — leading to erosion that's harder to detect and repair than a displaced blanket edge. The Mississippi DEQ ECB manual specifically flags this failure mode as a common post-installation problem.
Beyond best practice, Iowa sites have regulatory inspection requirements to account for. Under the Iowa DNR GP2 permit, disturbed areas not stabilized with perennial vegetative cover must be inspected at least once every 7 calendar days. Any SWPPP measures identified during inspection must be corrected within 7 calendar days.
Common Installation Problems and Fixes
Blanket Lifting or Displacement After Rain
Problem: The blanket lifts, pulls away from the trench, or slides downhill.
Cause: Insufficient staple density for the slope gradient, staples not driven flush, or anchor trench not properly backfilled and compacted.
Fix: Add staples at problem areas, tamp all staples flush with the soil, reopen and recompact the trench. Check the product-specific staple guide to determine whether the slope gradient calls for a higher-density pattern.
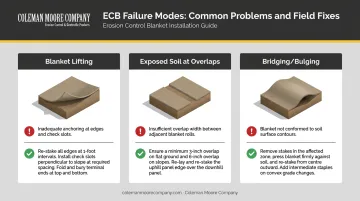
Exposed Soil / Gaps at Overlaps
Problem: Visible soil at seams, with erosion evident below the overlap.
Cause: Overlaps under 4 inches, or orientation reversed — downhill blanket placed over uphill blanket, allowing water to funnel under the seam.
Fix: Pull back the affected section, regrade and reseed the exposed area, reposition the overlap in the correct shingle direction, and re-staple at tighter intervals. At seams in high-flow areas, target staple spacing of every 3–5 inches.
Blanket Bulging or Bridging Over Soil
Problem: The blanket arches off the soil in sections, creating erosion channels below the mat.
Cause: Debris or soil clods left under the blanket during installation, or emerging seedlings lifting the mat where staking is sparse.
Fix: Add staples in the bridging area, targeting approximately 1.5-foot spacing, to pull the blanket back into soil contact. For severe bridging, cut the blanket at the sag, pull edges flat, re-stake, and patch with an overlapping section secured at all edges.
Pro Tips for Installing Erosion Control Blankets Effectively
Timing and Sequencing
- Install immediately after seeding — the blanket protects the seedbed, not the other way around
- Plan installation around the forecast: avoid placing blankets just before a major rain event when anchor trenches haven't had time to compact
- In Iowa, account for freeze-thaw cycles in spring and fall — frozen ground prevents staples from seating properly, and heave cycles can push lightly driven staples out over time
Handling and Technique
- Walk the full length of each blanket after rolling to press it into full contact with the soil before stapling
- Never stretch the blanket taut — it must lie naturally flat to follow soil contours
- Check the manufacturer's indicators on the outer packaging before cutting bands to confirm roll orientation
Documentation and Compliance
- Photograph the completed installation from multiple angles
- Document the staple pattern used, especially for DOT and regulatory agency projects
- Retain the manufacturer's installation guide on file throughout the project
For Iowa DOT projects, verify the selected product meets the applicable specification class under Iowa DOT Section 9040 before installation begins. If product selection or site conditions are uncertain, Coleman Moore Company can help. With over 20 years supplying Iowa civil infrastructure projects, their team matches the right product to your slope, flow conditions, and permit requirements. Reach them at 515-309-5577 or info@colemanmoorecompany.com.
Conclusion
Installation quality determines whether an erosion control blanket performs or fails. The right product, correctly installed — with a seeded surface, trenched anchors, proper overlap orientation, and adequate staple density — will protect the site through the full revegetation window. Cut any of those steps, and the blanket becomes a liability rather than a solution.
Follow this sequence without shortcuts:
- Prepare and grade the site before anything else
- Seed the soil surface prior to blanket placement
- Trench, anchor, roll, overlap, and stake in order
- Inspect after every qualifying rain event until vegetation is fully established
Every one of these steps is load-bearing. Skip one, and the others can't compensate.
For contractors and engineers working on Iowa civil and DOT projects, Coleman Moore Company supplies DOT-compliant erosion control blankets and can help match the right product to your slope conditions, soil type, and permit requirements. Contact the team at 515-309-5577 or info@colemanmoorecompany.com.
Frequently Asked Questions
Should you seed before or after installing an erosion control blanket?
Seed first, then install the blanket. The ECB goes over the seeded, compacted surface to hold seeds in contact with the soil, retain moisture, and protect germination. Installing the blanket before seeding makes it nearly impossible to get seed down into the soil profile where it can germinate.
Where should erosion control blankets be installed?
ECBs are used on any bare soil exposed to rainfall, wind, or overland flow until vegetation establishes: disturbed slopes, highway embankments, drainage channels and ditches, streambank restoration areas, and construction site perimeters.
What is the lifespan of an erosion control blanket?
Lifespan depends on material: straw blankets degrade in roughly 3 months, wood excelsior in 12–24 months, and coir fiber in 2–3 years. Synthetic turf reinforcement mats are permanent. The goal is vegetation establishment before the blanket degrades.
What type of stakes or staples should I use with an erosion control blanket?
Wire U-shaped staples are standard. Iowa DOT Section 4169 specifies a minimum leg length of 6 inches for slope protection and 10 inches for TRMs; use longer staples in loose or sandy soils, shorter in firm or cohesive soils. DOT and environmentally sensitive projects may require biodegradable wooden stakes — always verify the manufacturer's staple guide and project specification.
Do erosion control blankets work on steep slopes?
Yes, within the product's rated gradient. Single-net blankets typically handle up to 3:1 slopes; double-net products up to 1:1. Steeper slopes require higher staple density and may call for a turf reinforcement mat rather than a standard biodegradable ECB.
Can erosion control blankets be used in channels and ditches?
Yes, but channel-specific products rated for the anticipated flow velocity must be selected. Installation runs parallel to flow and requires higher staple density, upstream anchor trenches, and periodic check slots. Match the product to the channel's hydraulic data sheet, not a generic ECB spec.